When you add a prep station, you have the option of choosing whether items for that prep station go to that prep station, the expediter, or both, using the Send to setting. The options are:
-
Prep station and expediter: Items are sent to the prep station and the expediter.
-
Expediter only: Items are only sent to the expediter. Items are not sent to the prep station KDS device, but are still printed at the prep station printer if a printer is assigned and configured to print.
If you choose to require fulfillment at prep station KDS devices before expediter KDS devices using the Sequenced prep to expo fulfillment setting, items assigned a prep station with the Send to setting set to Expediter only do not require fulfillment at prep stations, because they are not sent to the prep station at all.
They also do not appear as an option when assigning prep stations to a KDS device. For more information, see Assigning a KDS device to a prep station.
-
Prep station only: Items are only sent to the prep station. Items are not sent to the expediters.
|
Note |
|
The Send to setting applies to both KDS and printed tickets. |
When you add a prep station, you also assign a printer to it.
-
If you use kitchen printers, assign kitchen printers to each prep station when you add the prep station.
-
If you use KDS devices, assign a single, backup printer to every prep station.
To add a prep station, you must have the 6. Web Setup > 6.2 Kitchen / Dining Room Setup access permission.
|
Note |
|
The Prep stations page has recently changed. To see how to add a prep station on the legacy page, see the legacy Prep stations page procedure. |
To add a prep station
-
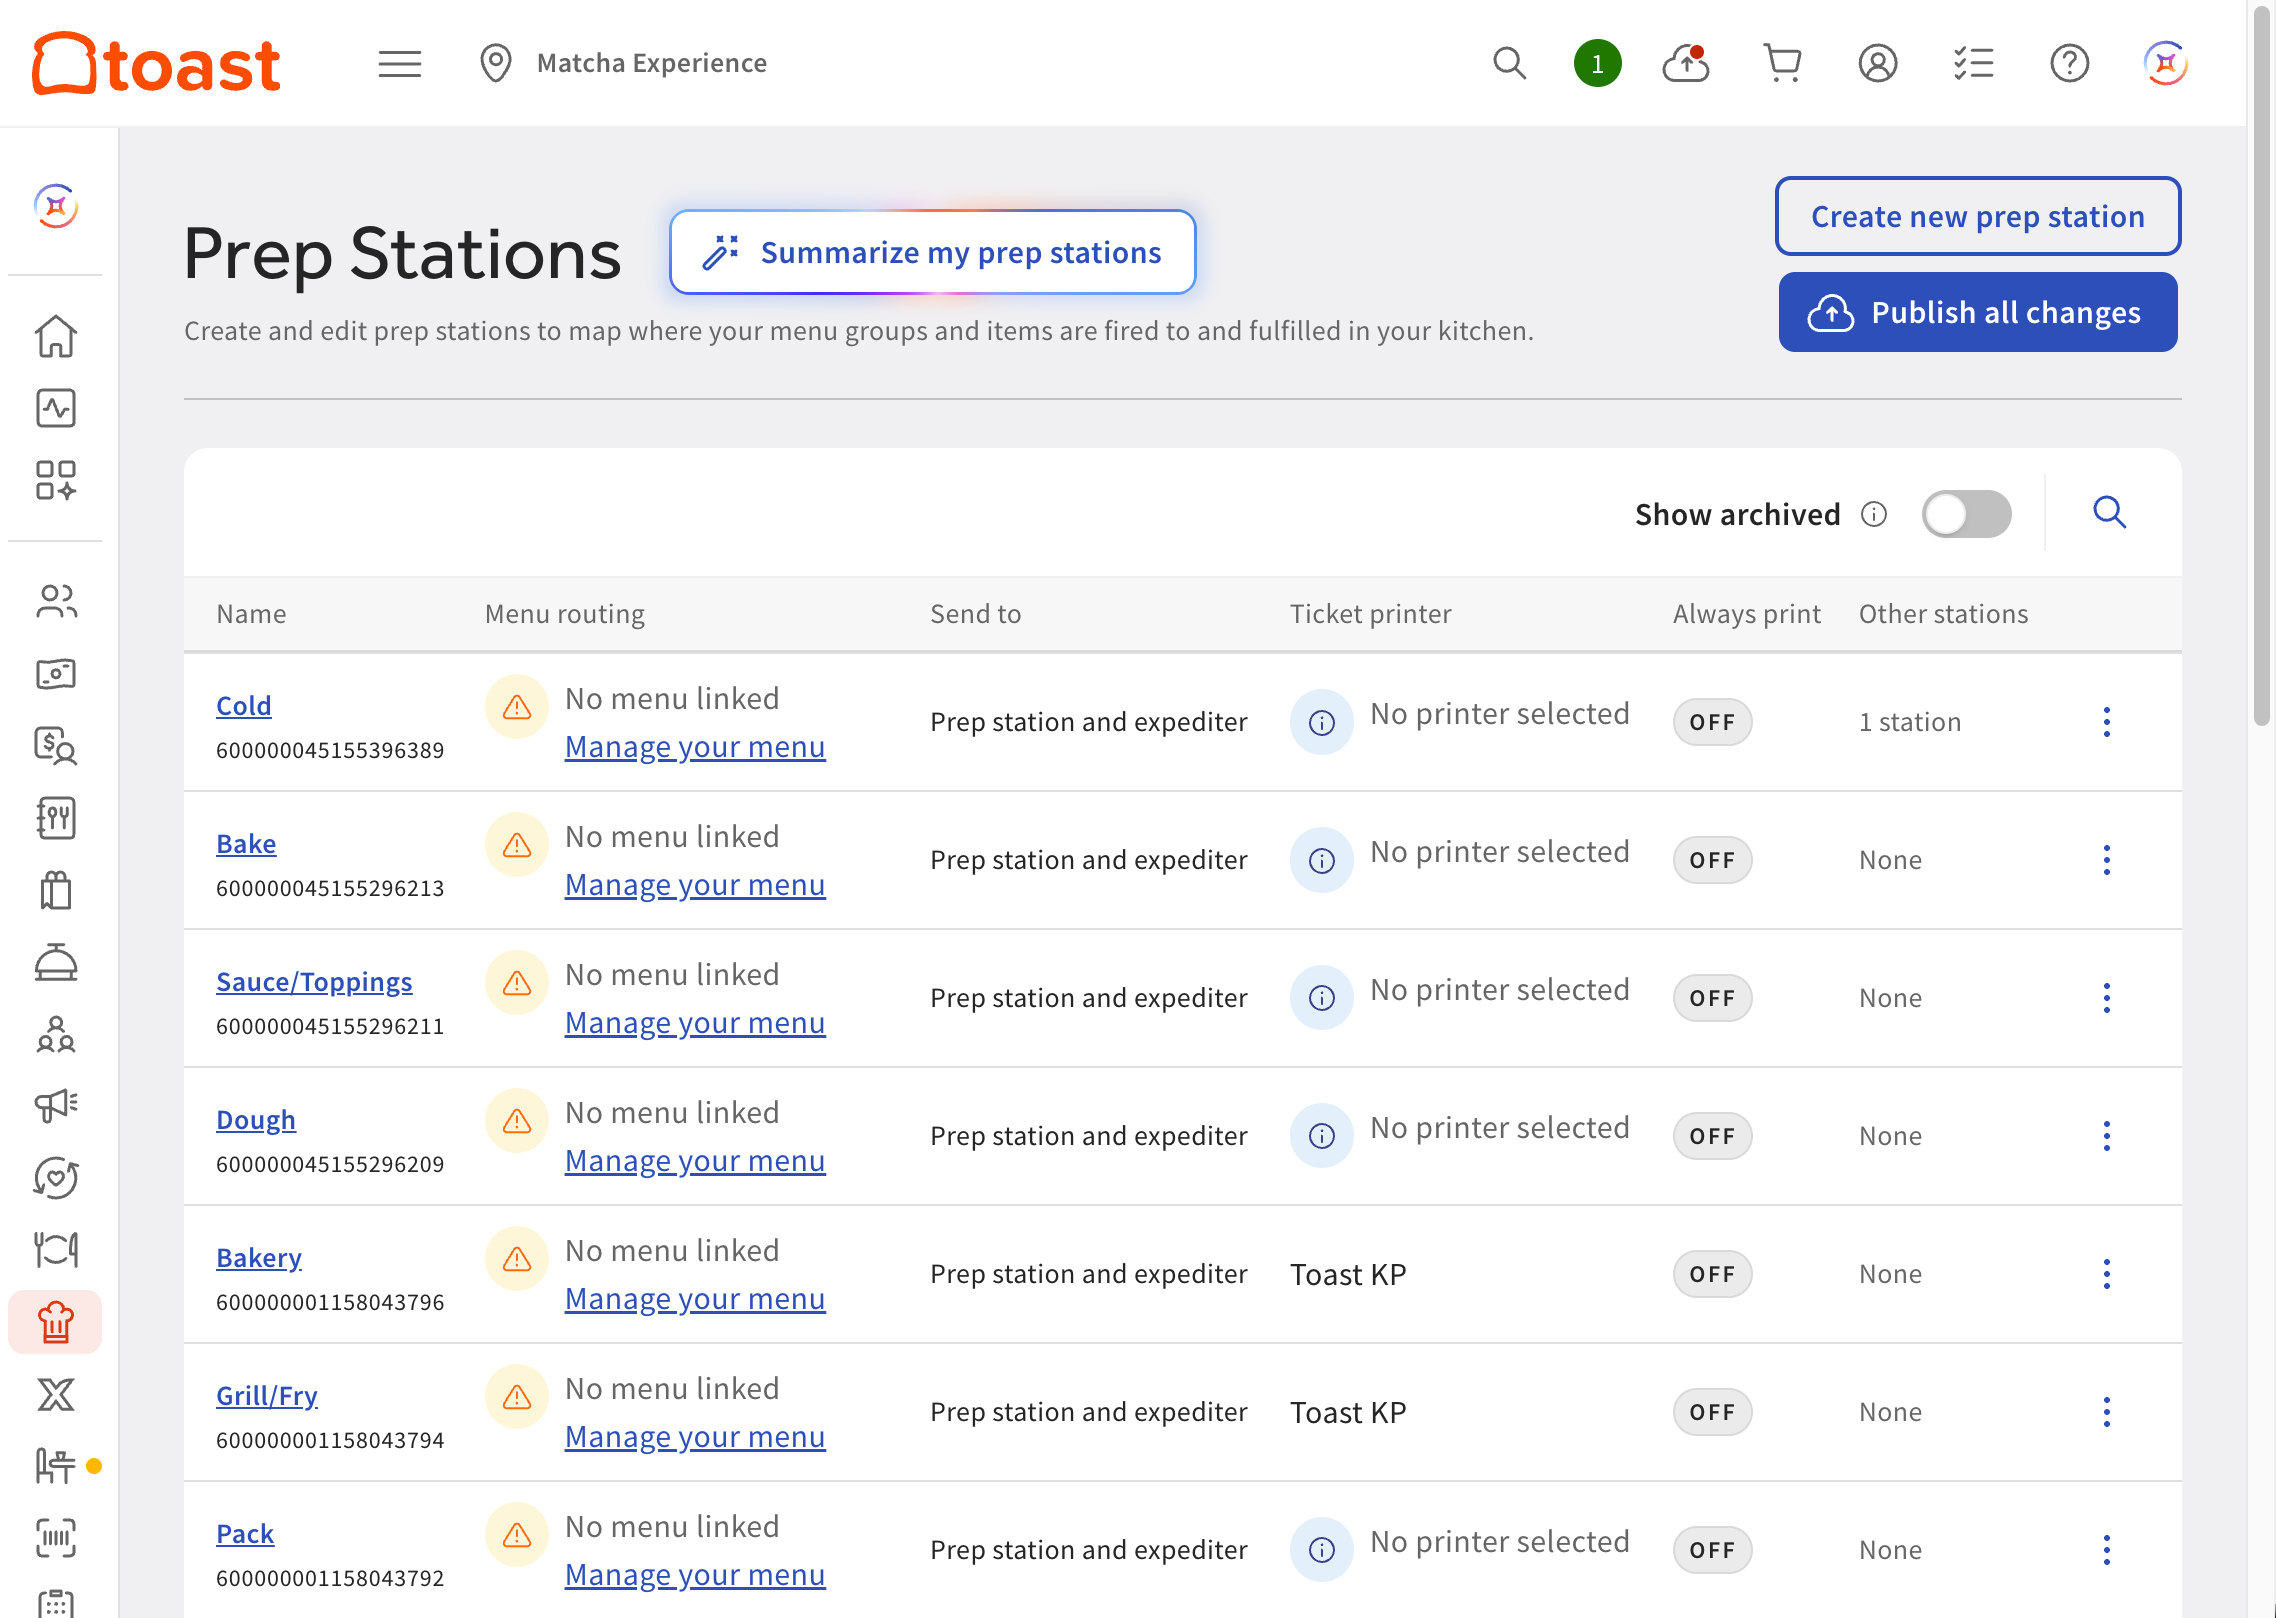
Go to Kitchen > Kitchen stations > Prep stations. The Prep stations page opens.
-
Select Create a prep station. The Create a prep station dialog opens.
-
Enter a name for the new prep station in the Prep station name field.
-
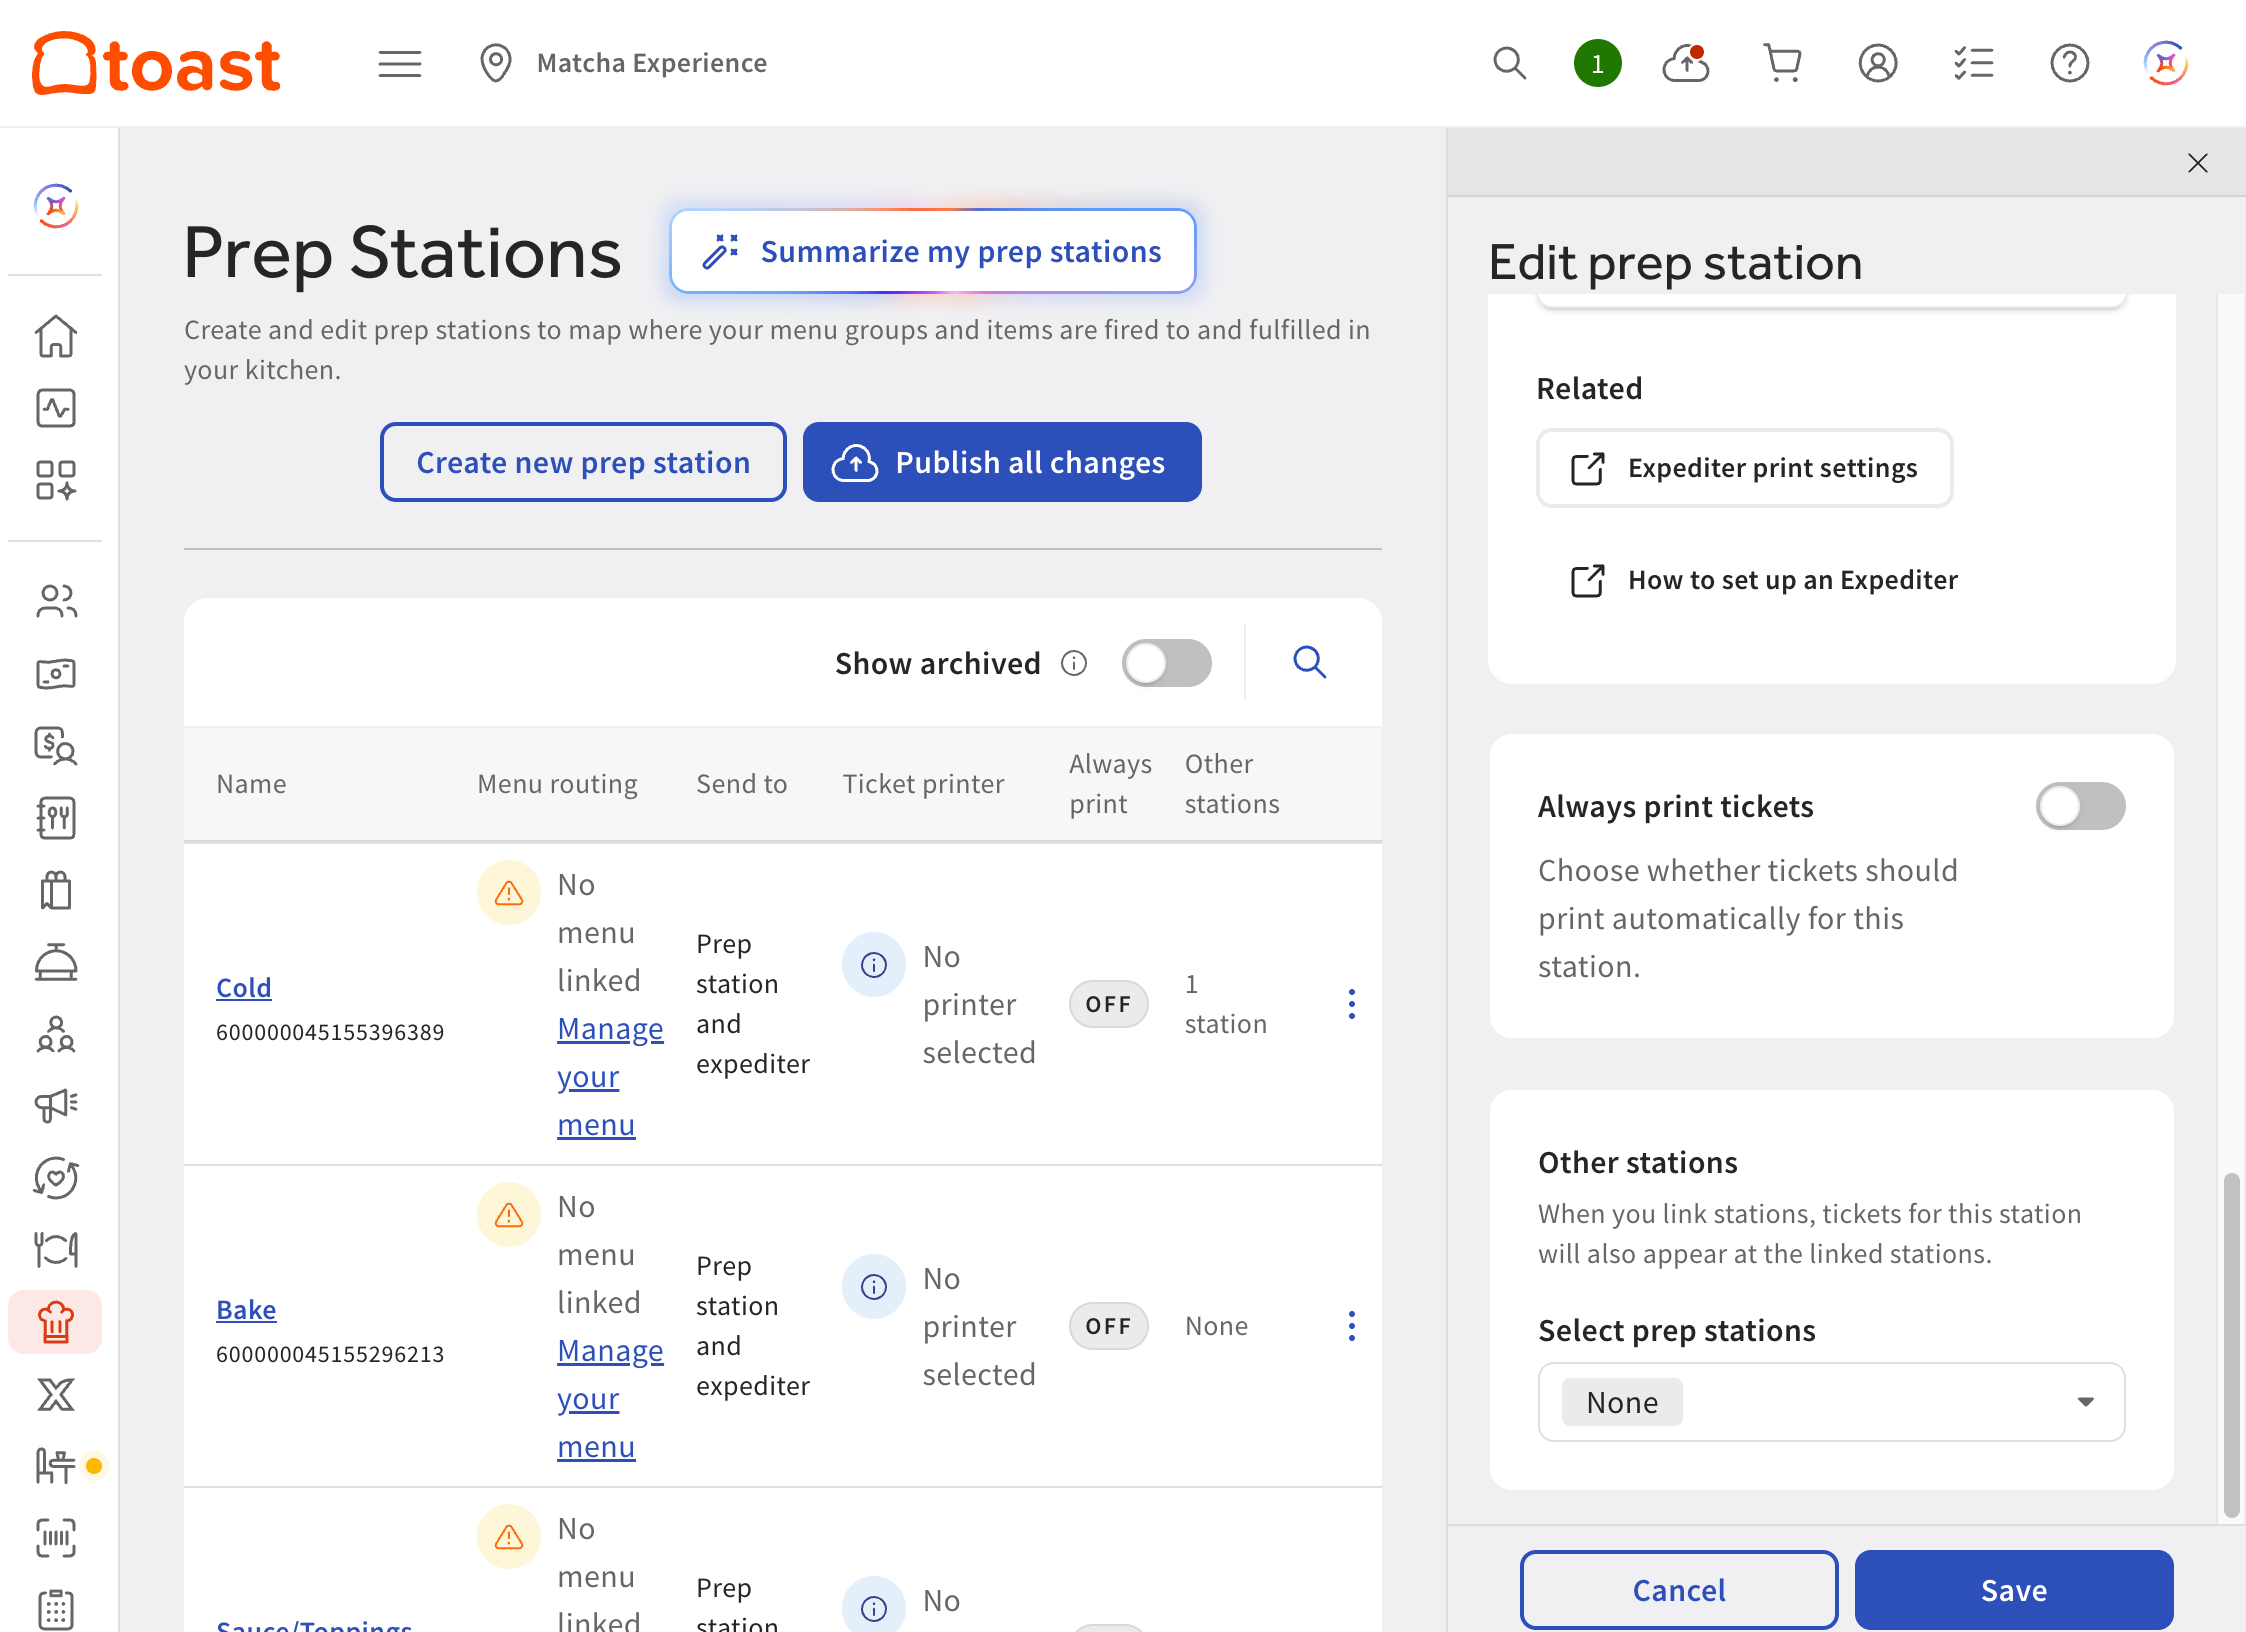
Select Save. The Edit prep station pane opens.
Note
The Menu routing information currently says that no menus or menu groups are assigned to the prep station, because it is a new prep station you have not assigned to any menu entities. Menu routing only shows menus and menu groups using the prep station; it does not show menu items or modifiers.
-
Optionally, in the Ticket printer section, use the Select printer dropdown menu to choose a printer. Prep stations assigned to KDS devices do not require a printer. If you do assign a printer and use a KDS device, the items will have both printed and KDS kitchen tickets.
-
In the Send to section, choose one of the following:
-
Prep station only: Items assigned to this prep station are only sent to the prep station’s printer and KDS device.
-
Prep station and expediter: Items assigned to this prep station are sent to both the prep station and expediter.
-
Expediter only: Items assigned to this prep station are sent to the expediter. If a printer is assigned to the prep station, tickets still print.
-
-
In the Always print tickets section, turn the toggle button on if you want tickets to always print for the prep station.
Note
If the prep station uses a KDS device, set the Always Print Tickets setting to OFF. This option only prints tickets when the Toast platform is in offline mode.
-
In the Other stations section, use the Select prep stations dropdown menu to choose other prep stations that will appear on printed tickets. If an order contains items assigned to different prep stations, and those prep stations are chosen as the Other stations, those items will appear on printed tickets.
-
Select Save.
-
Publish your changes when ready.
Note
Toast Support recommends publishing or scheduling publishing changes outside operating hours to avoid confusing employees with unexpected configuration changes.
To add a prep station using the legacy Prep stations page
|
Note |
|
The Prep stations page has recently changed. To see how to add a prep station on the new page, see the Prep stations page procedure. |
-
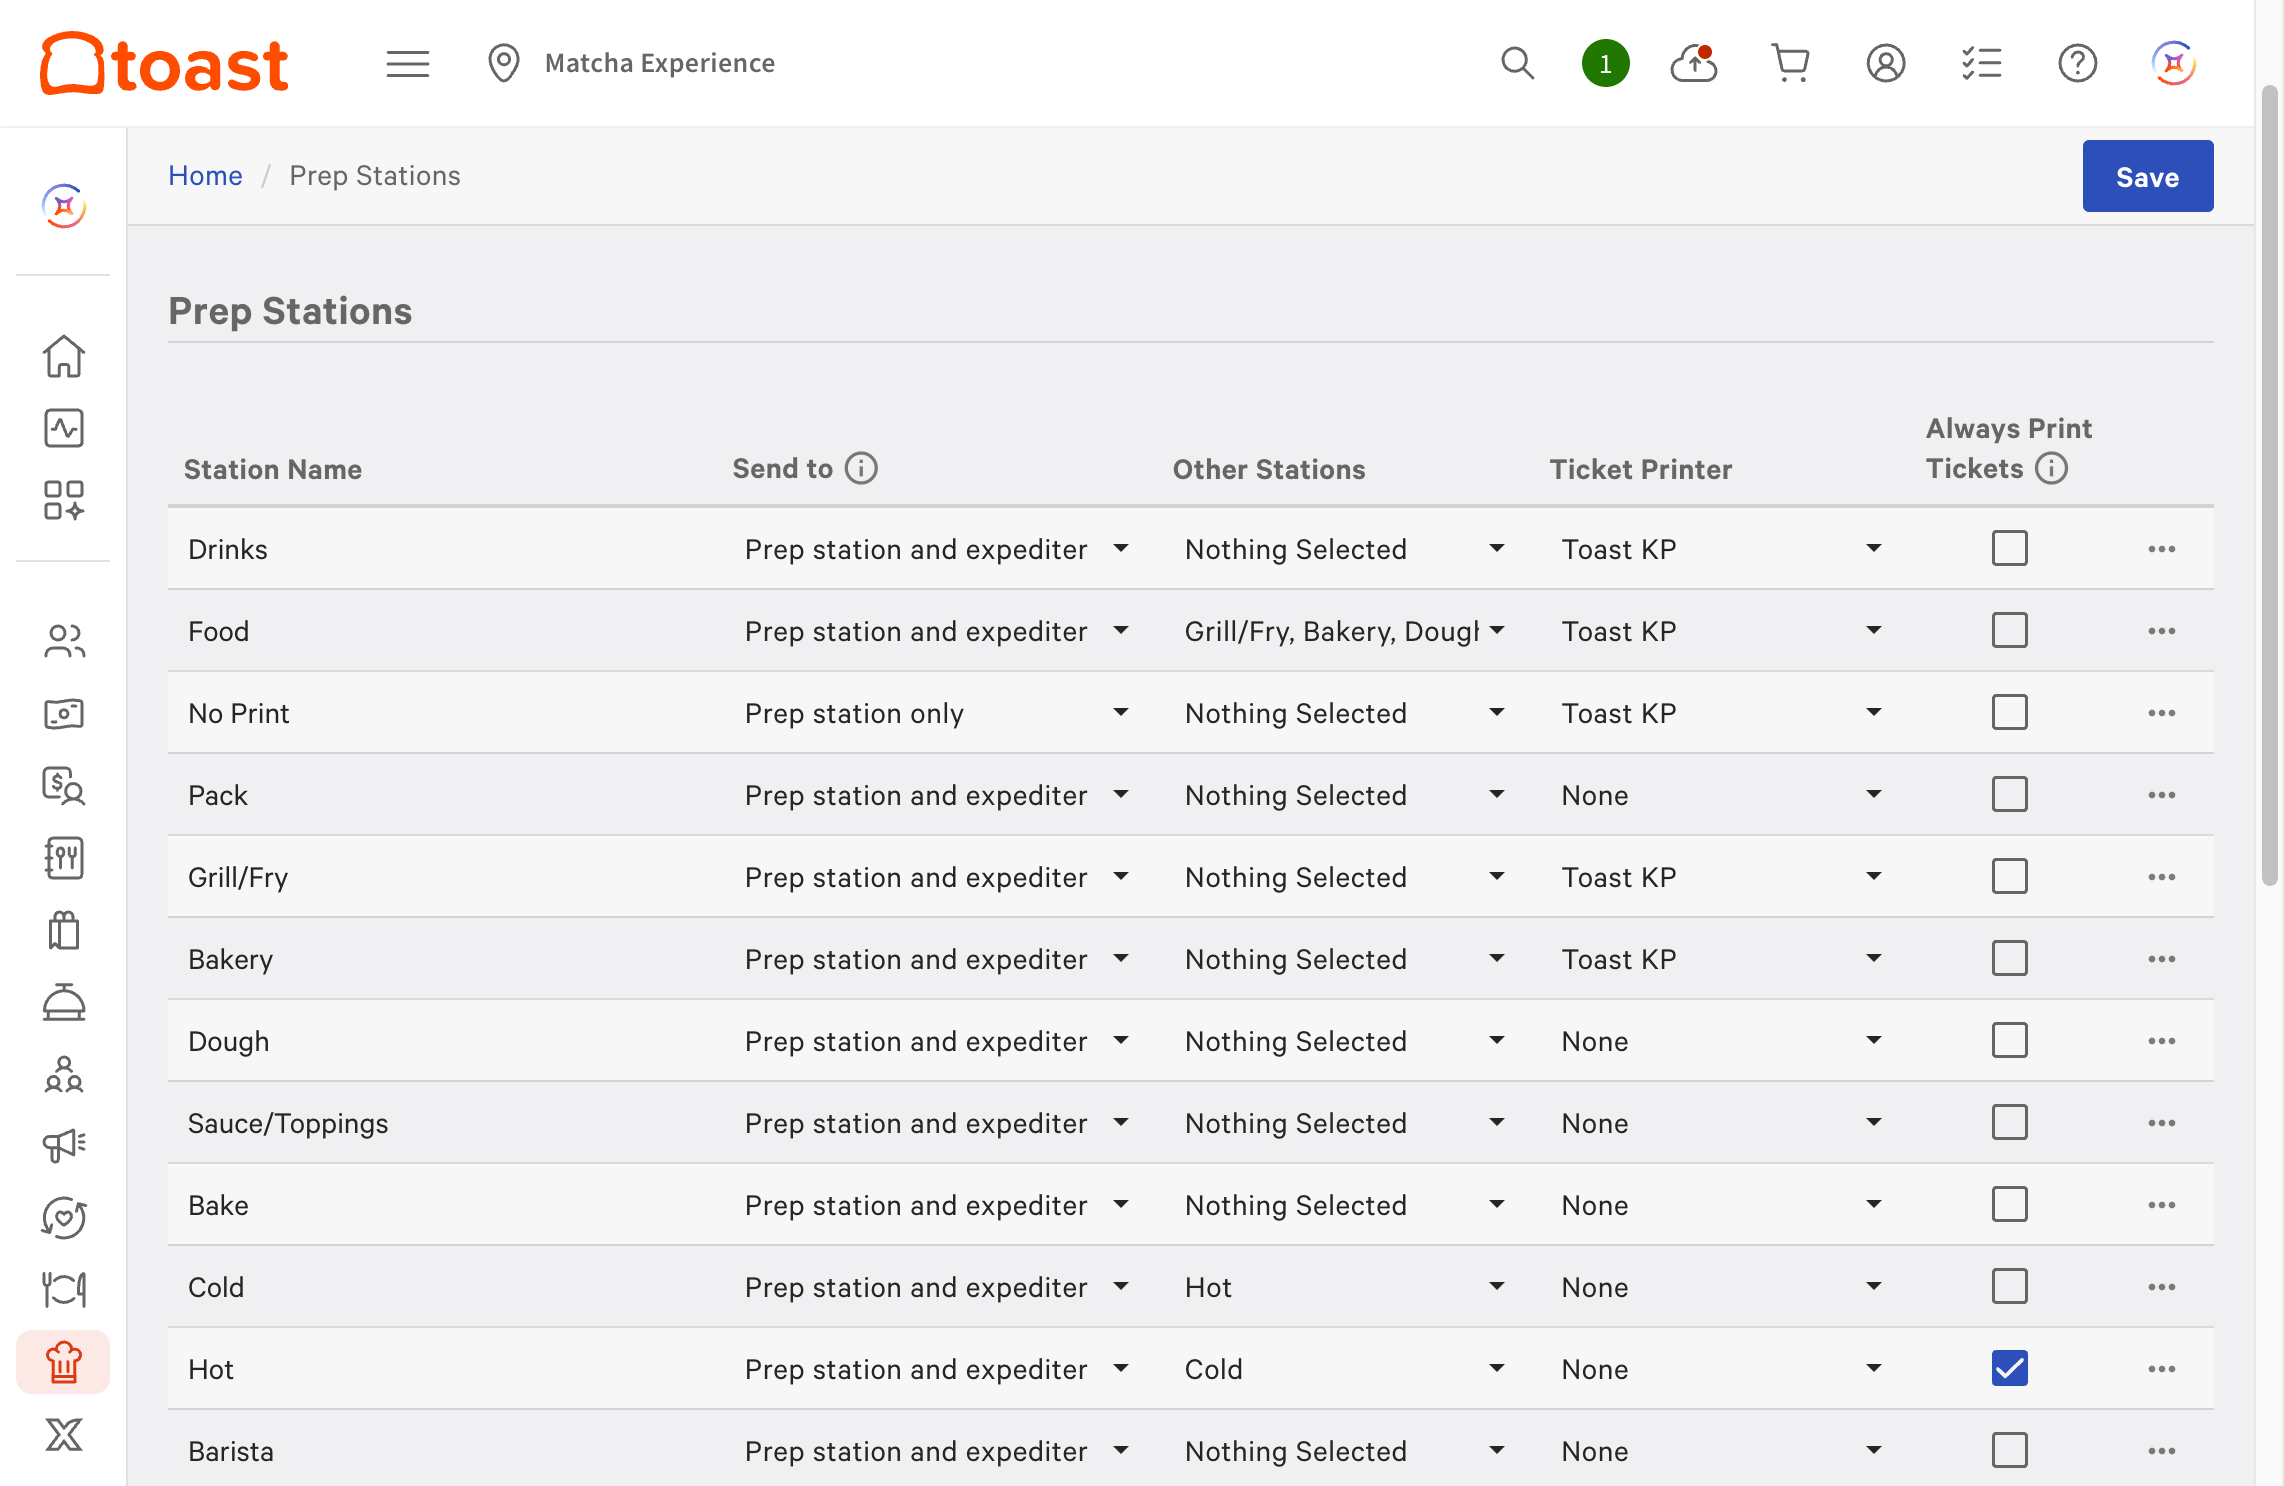
Go to Kitchen > Kitchen stations > Prep stations.
-
Select the + Add button. The Toast platform adds a row to the interactive grid.
-
Enter an identifying name for the prep station.
-
To print or display the prep station's tickets at a prep station printer or KDS, expediter printer or KDS, or both, choose the corresponding Send to setting option.
For example, your expediter station needs tickets from your Hot and Cold prep stations, but not for your Bar prep station. You select Prep stations and expediter for the Hot and Cold prep stations, and Prep station only for the Bar. For more information, see Configure the expediter workflow.
-
To monitor items sent to another station or stations by printing them on kitchen tickets, select the Other Stations. This option affects printed kitchen tickets only. For more information, see Monitoring items at other prep stations.
-
Select the kitchen printer that you want to print this prep station's tickets.
-
If the prep station uses a KDS, assign the backup printer.
-
If the prep station is a virtual or "no print" prep station, do not select a printer.
-
-
If the prep station primarily uses a kitchen printer, check Always Print Tickets. Every ticket sent to this prep station prints at the specified printer.
Note
If the prep station uses a KDS device, clear the Always Print Tickets checkbox. Tickets print only when the Toast platform is in offline mode.
-
Save and publish your changes.
Repeat these steps to add your other prep stations.
After you set up your prep stations, you can assign KDS devices to them (if applicable) and add them to your menus.